일모도원(日暮途遠) 개발자
[XCode] 딴 사람 프로젝트 열기 오류 케이스 1번째 본문
텐서플로우에 있는 iOS프로젝트를 한번 열어볼려고 했는데 한번에 잘 안되어서 기록해둔다.
https://github.com/tensorflow/examples/tree/master/lite/examples/object_detection/ios
원하는 경로에 소스를 복사한다.
>git clone https://github.com/tensorflow/examples.git
여러 소스들이 같이 포함되어 있어서, 내가 열려고 하는것은 아래 경로에 있다.
(xcworkspace파일이 없고 그냥 xcodeproj파일만 있다.)

잘만든 소스들이라, 이렇게 ReadMe가 상세하다. 잘 읽어야 하는데, 안 읽고 하다가 여러 오류를 겪고 겨우 실행했다.
README.md
# TensorFlow Lite Object Detection iOS Example Application

**iOS Versions Supported:** iOS 12.0 and above.
**Xcode Version Required:** 10.0 and above

## Overview

This is a camera app that continuously detects the objects (bounding boxes and classes) in the frames seen by your device's back camera, using a quantized [MobileNet SSD](https://github.com/tensorflow/models/tree/master/research/object_detection) model trained on the [COCO dataset](http://cocodataset.org/). These instructions walk you through building and running the demo on an iOS device.

The model files are downloaded via scripts in Xcode when you build and run. You don't need to do any steps to download TFLite models into the project explicitly.

<!-- TODO(b/124116863): Add app screenshot. -->

## Prerequisites

* You must have Xcode installed

* You must have a valid Apple Developer ID

* The demo app requires a camera and must be executed on a real iOS device. You can build it and run with the iPhone Simulator but the app raises a camera not found exception.

* You don't need to build the entire TensorFlow library to run the demo, it uses CocoaPods to download the TensorFlow Lite library.

* You'll also need the Xcode command-line tools:
 ```xcode-select --install```
 If this is a new install, you will need to run the Xcode application once to agree to the license before continuing.
## Building the iOS Demo App

1. Install CocoaPods if you don't have it.
```sudo gem install cocoapods```

2. Install the pod to generate the workspace file:
```cd lite/examples/object_detection/ios/```
```pod install```
  If you have installed this pod before and that command doesn't work, try
```pod update```
At the end of this step you should have a file called ```ObjectDetection.xcworkspace```

3. Open **ObjectDetection.xcworkspace** in Xcode.

4. Please change the bundle identifier to a unique identifier and select your development team in **'General->Signing'** before building the application if you are using an iOS device.

5. Build and run the app in Xcode.
You'll have to grant permissions for the app to use the device's camera. Point the camera at various objects and enjoy seeing how the model classifies things!

### Note
_Please do not delete the empty references_ to the .tflite and .txt files after you clone the repo and open the project. These references will be fulfilled once the model and label files are downloaded when the application is built and run for the first time. If you delete the references to them, you can still find that the .tflite and .txt files are downloaded to the Model folder, the next time you build the application. You will have to add the references to these files in the bundle separately in that case.

## Model Used

This app uses a MobileNet SSD model trained on [COCO dataset](http://cocodataset.org/). The input image size required is 300 X 300 X 3. You can download the model [here](https://storage.googleapis.com/download.tensorflow.org/models/tflite/coco_ssd_mobilenet_v1_1.0_quant_2018_06_29.zip). You can find more information on the research on object detection [here](https://github.com/tensorflow/models/tree/master/research/object_detection).

## iOS App Details

The app is written entirely in Swift and uses the TensorFlow Lite
[Swift library](https://github.com/tensorflow/tensorflow/tree/master/tensorflow/lite/swift)
for performing image classification.

Note: Objective-C developers should use the TensorFlow Lite
[Objective-C library](https://github.com/tensorflow/tensorflow/tree/master/tensorflow/lite/objc).
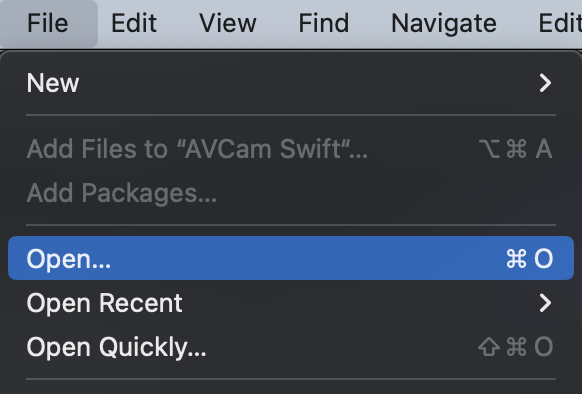
XCode에서 다운 받은 프로젝트를 열어보자.

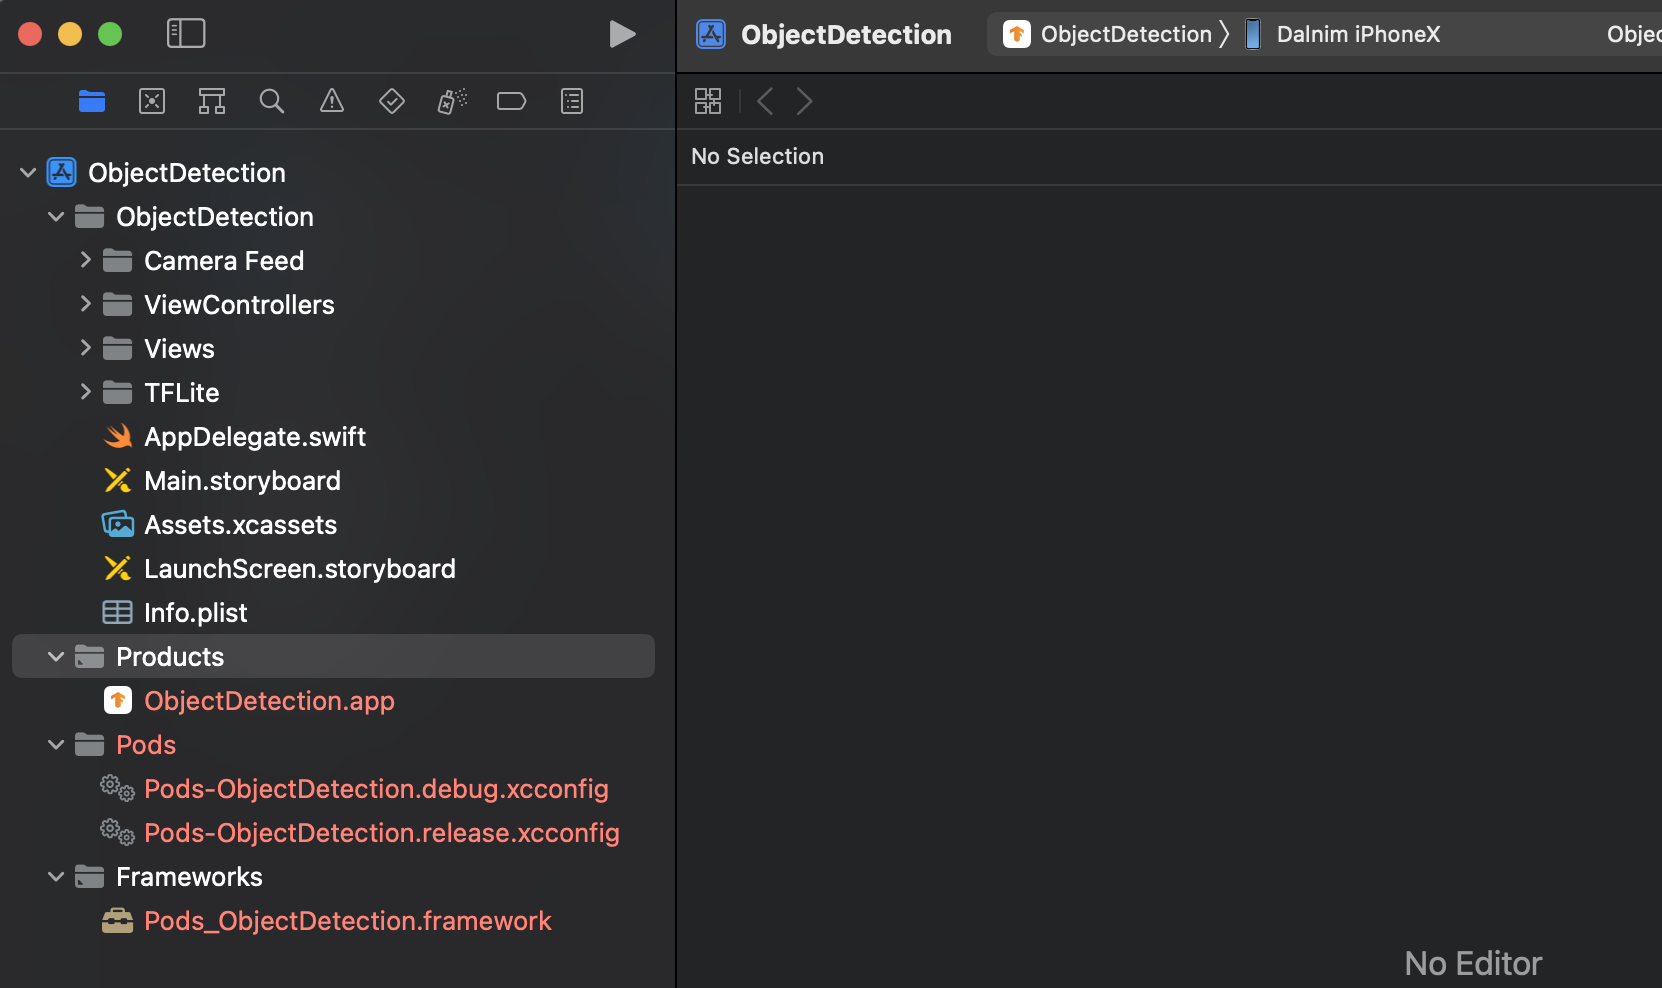
열어보면 이렇게 빨간 색들이 보인다. 뭔가 불안하다....
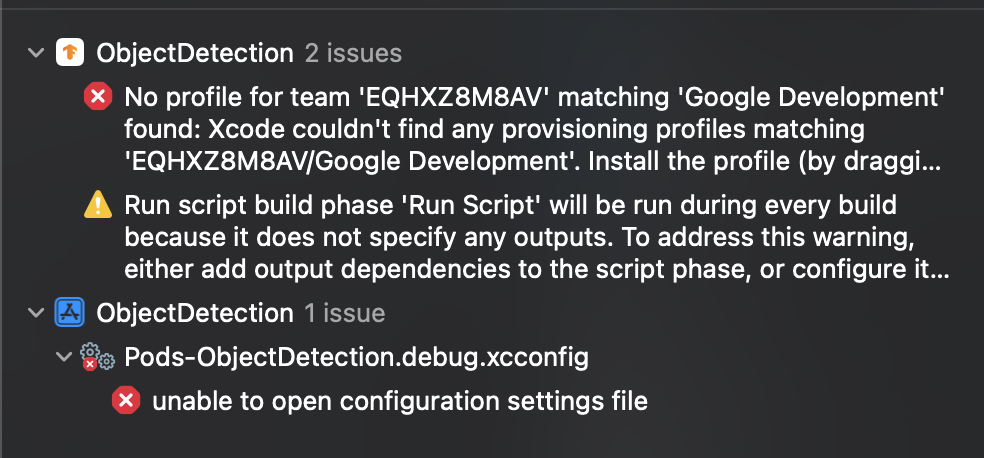
혹시나 그냥 잘될까 싶어서 실행해보았다.

잘 될리가...
보니까 개발자 계정이 안맞다는거 같다.
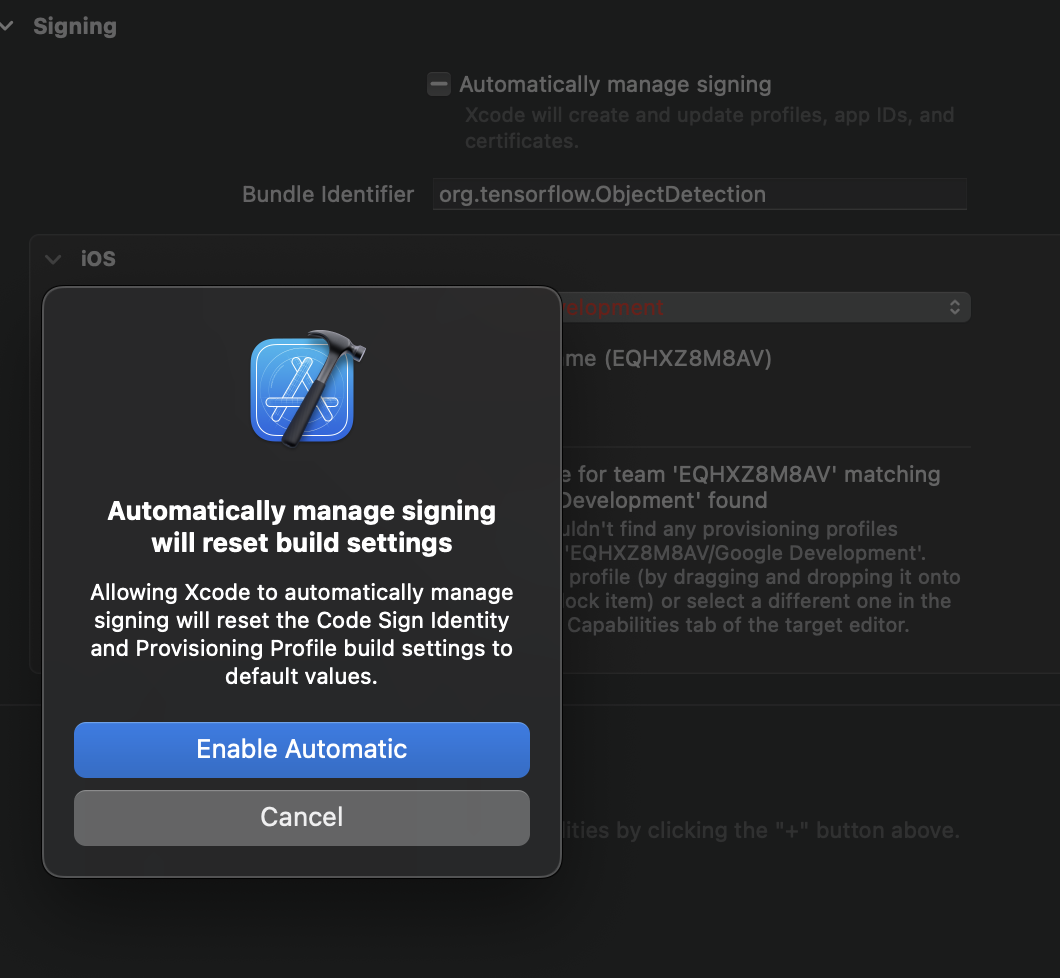
Signing & Capabilities에서 보니까 Profile이 뻘겋게 있다.
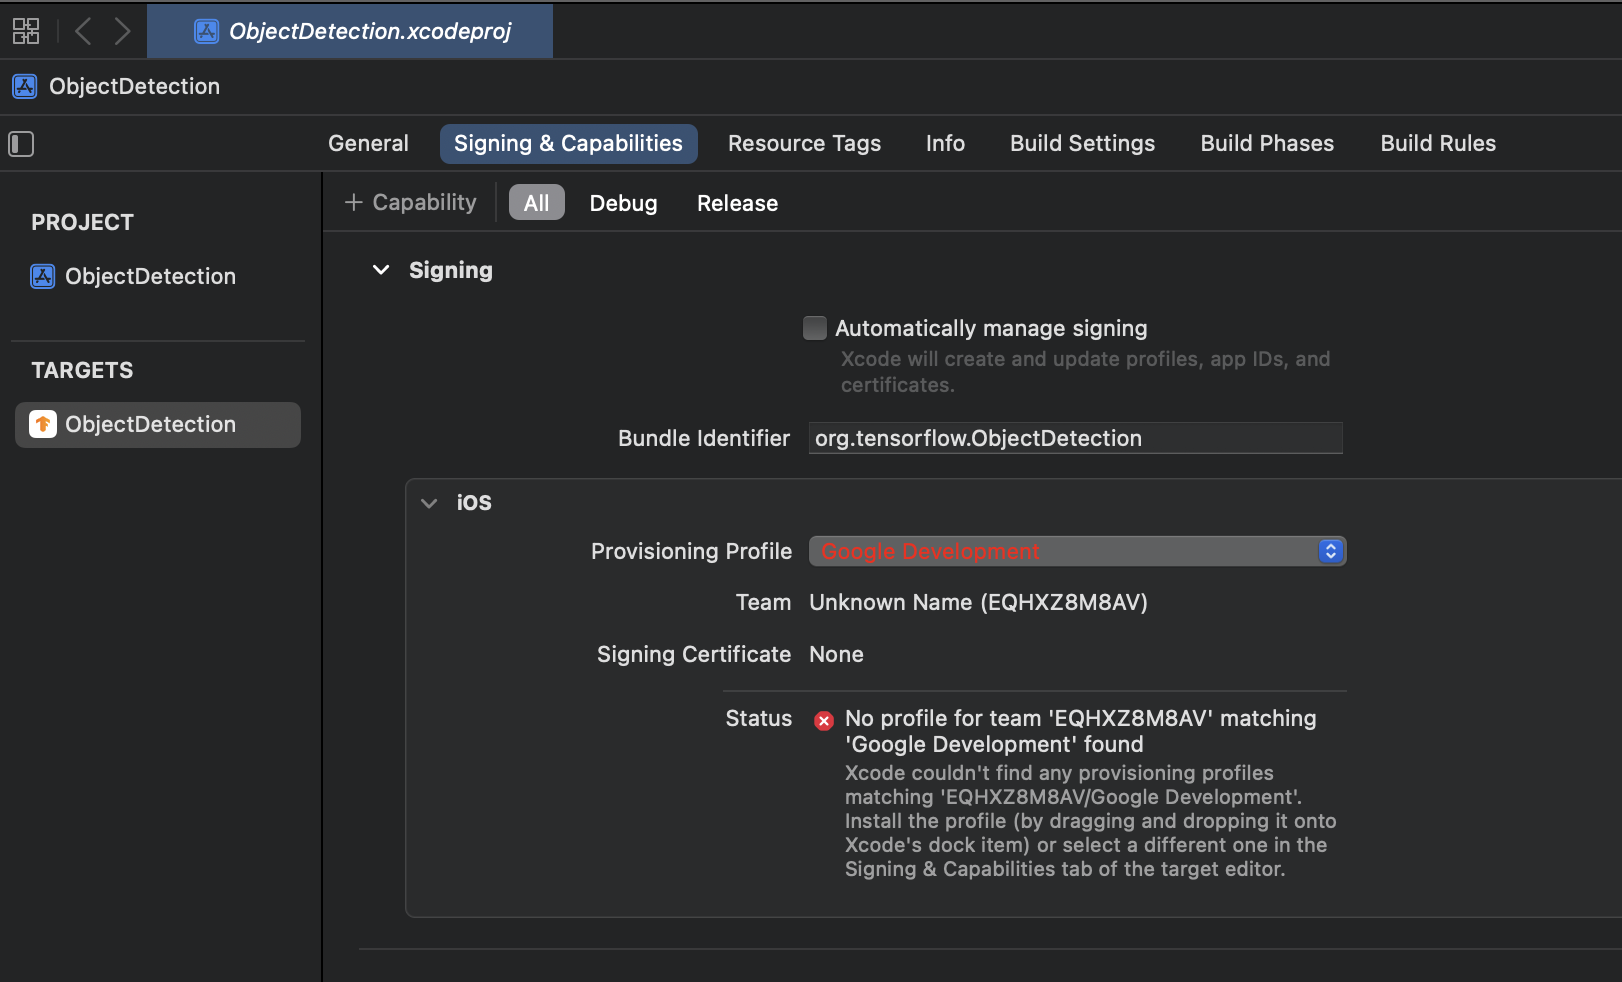
상단의 Automatically manage signing 체크 박스를 선택하면 아래 팝업이 나온다. Enable Automatic를 선택하자.
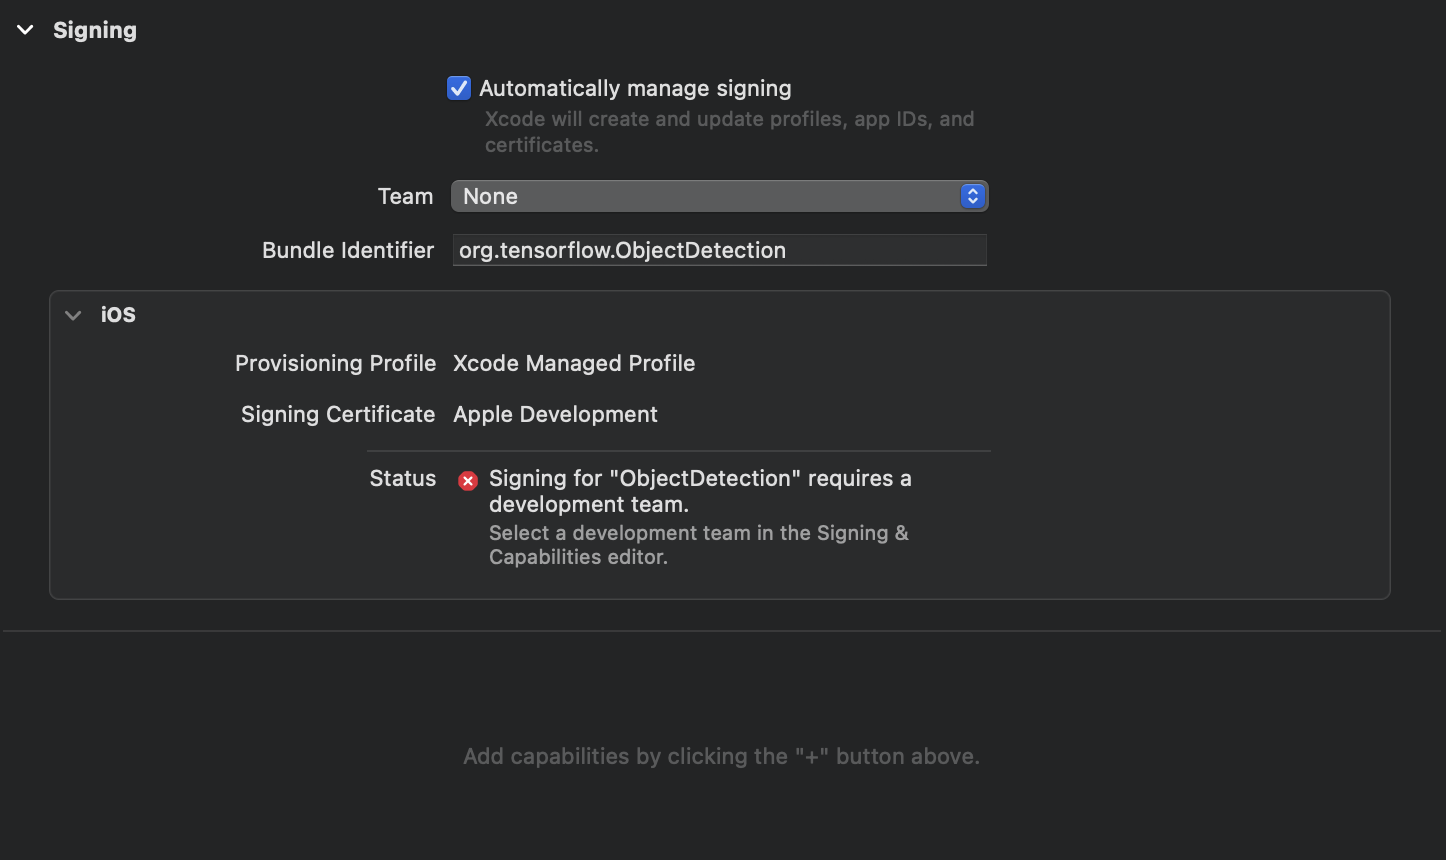
그래도 빨간 X버튼이 보인다. 이건 Team을 선택안해줘서 그렇다.
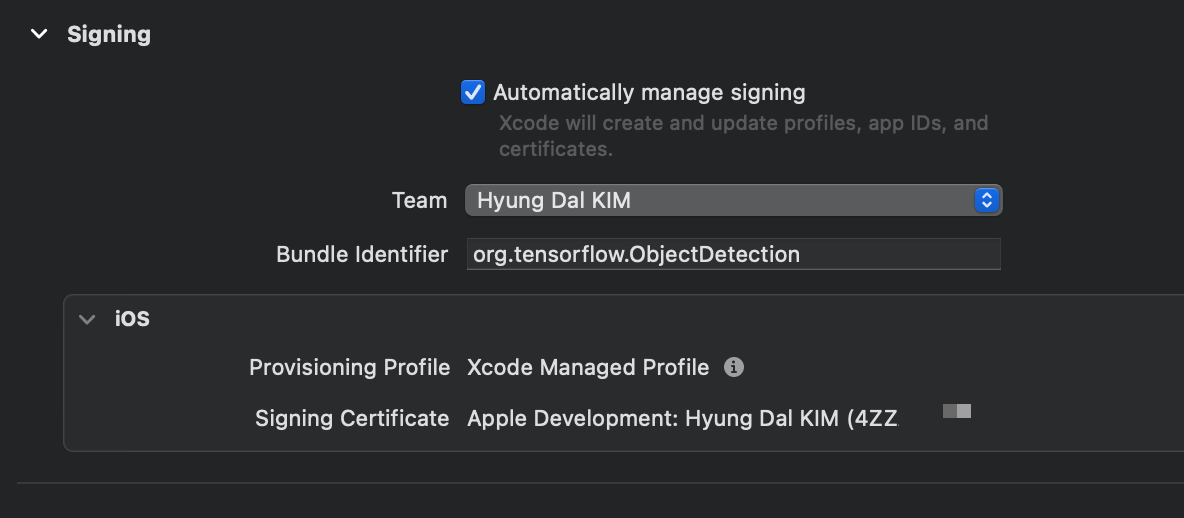
본인 개발자 계정(?)을 선택하자. 이제 에러가 사라진다.
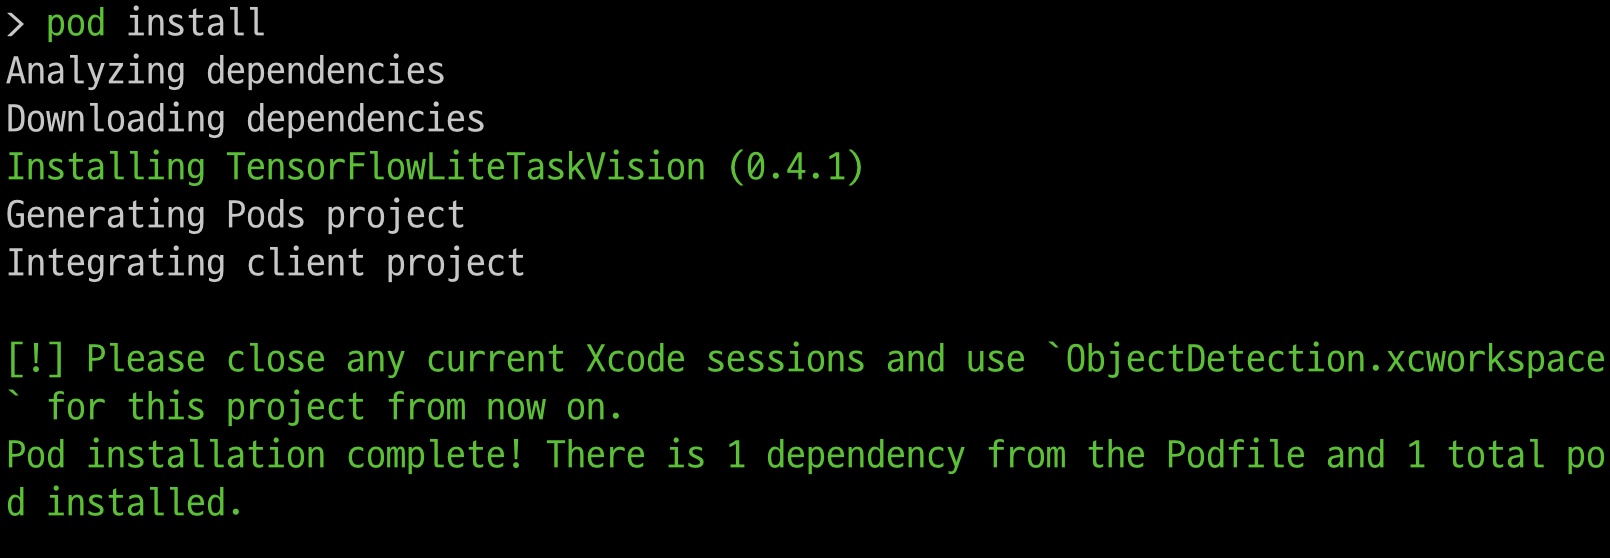
혹시나 싶어서 다시 실행해보니 또 에러가 나온다. ReadMe를 다시 읽어보니 pod install을 하라고 한다.

pod install을 실행하니 TensorFlowLiteTaskVision을 설치한다.
이번에도 로그 내용을 안읽었는데... 자세히 보면 현재 XCode를 닫고 ObjectDetection.scworkspace를 사용하라고 한다. 즉 지금 XCode를 닫고 다시 열어라는 뜻이다.
pod insatll실행후 현재 XCode를 안 닫고 또 실행해보니.. 아래 에러가 나온다...
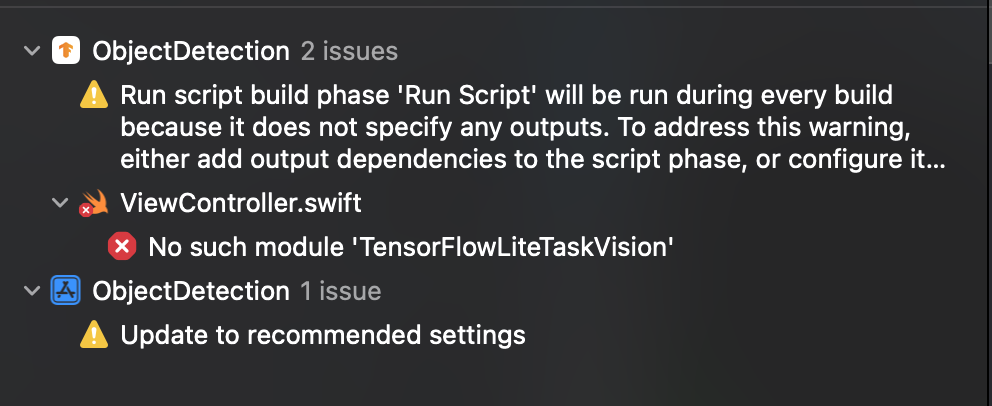
현재 XCode를 닫고 다시 열려고 보니 ObjectDetection.scworkspace가 생성된게 보인다.

다시 열어보니, Pods가 생겼고, 안에 TensorFlowLiteTaskVision이 있는게 보인다.
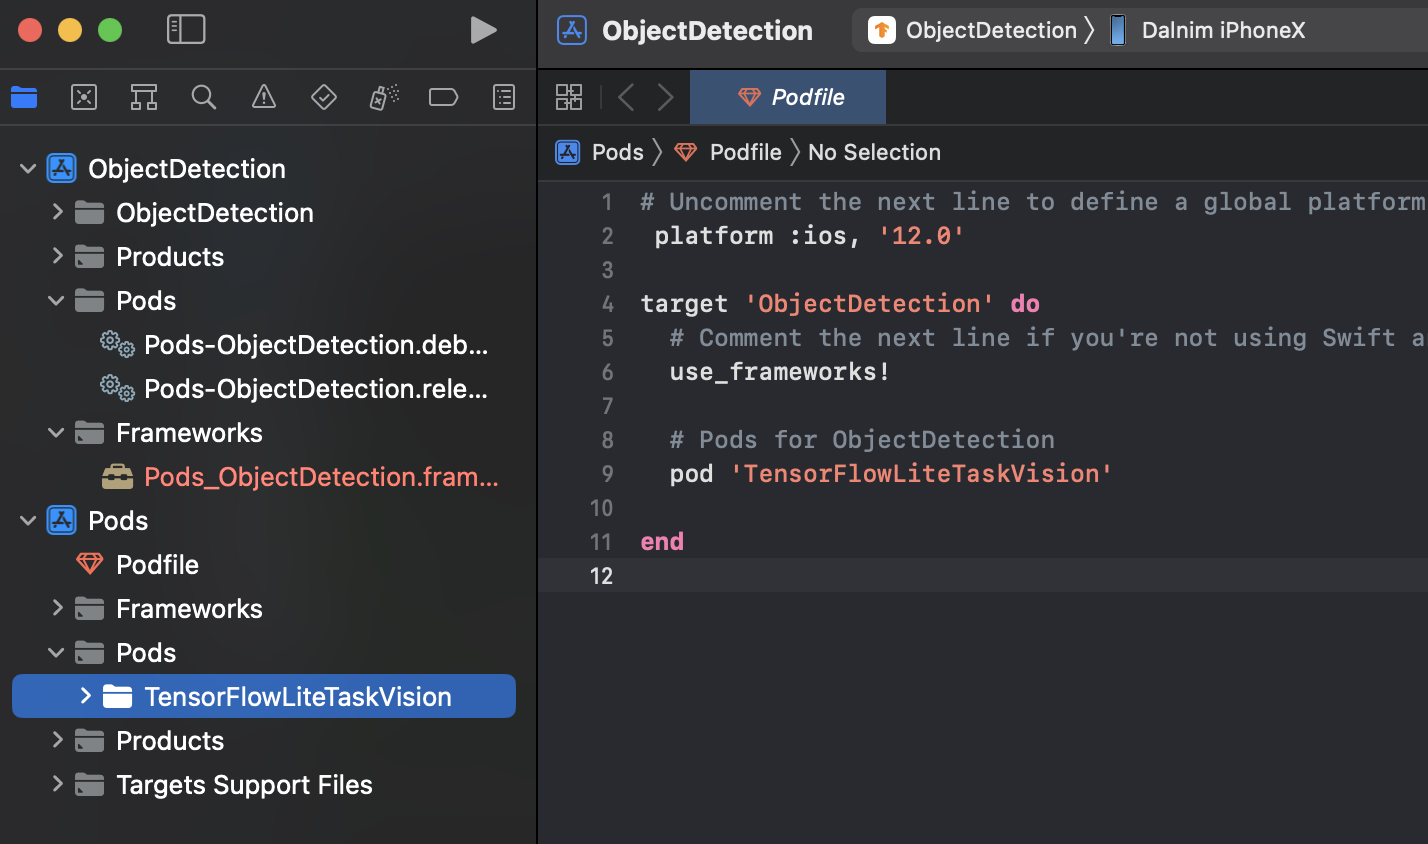
이제 다시 실행해보니 이제 정상적으로 설치가 된다. (이 예제는 실 기기가 있어야 한다)

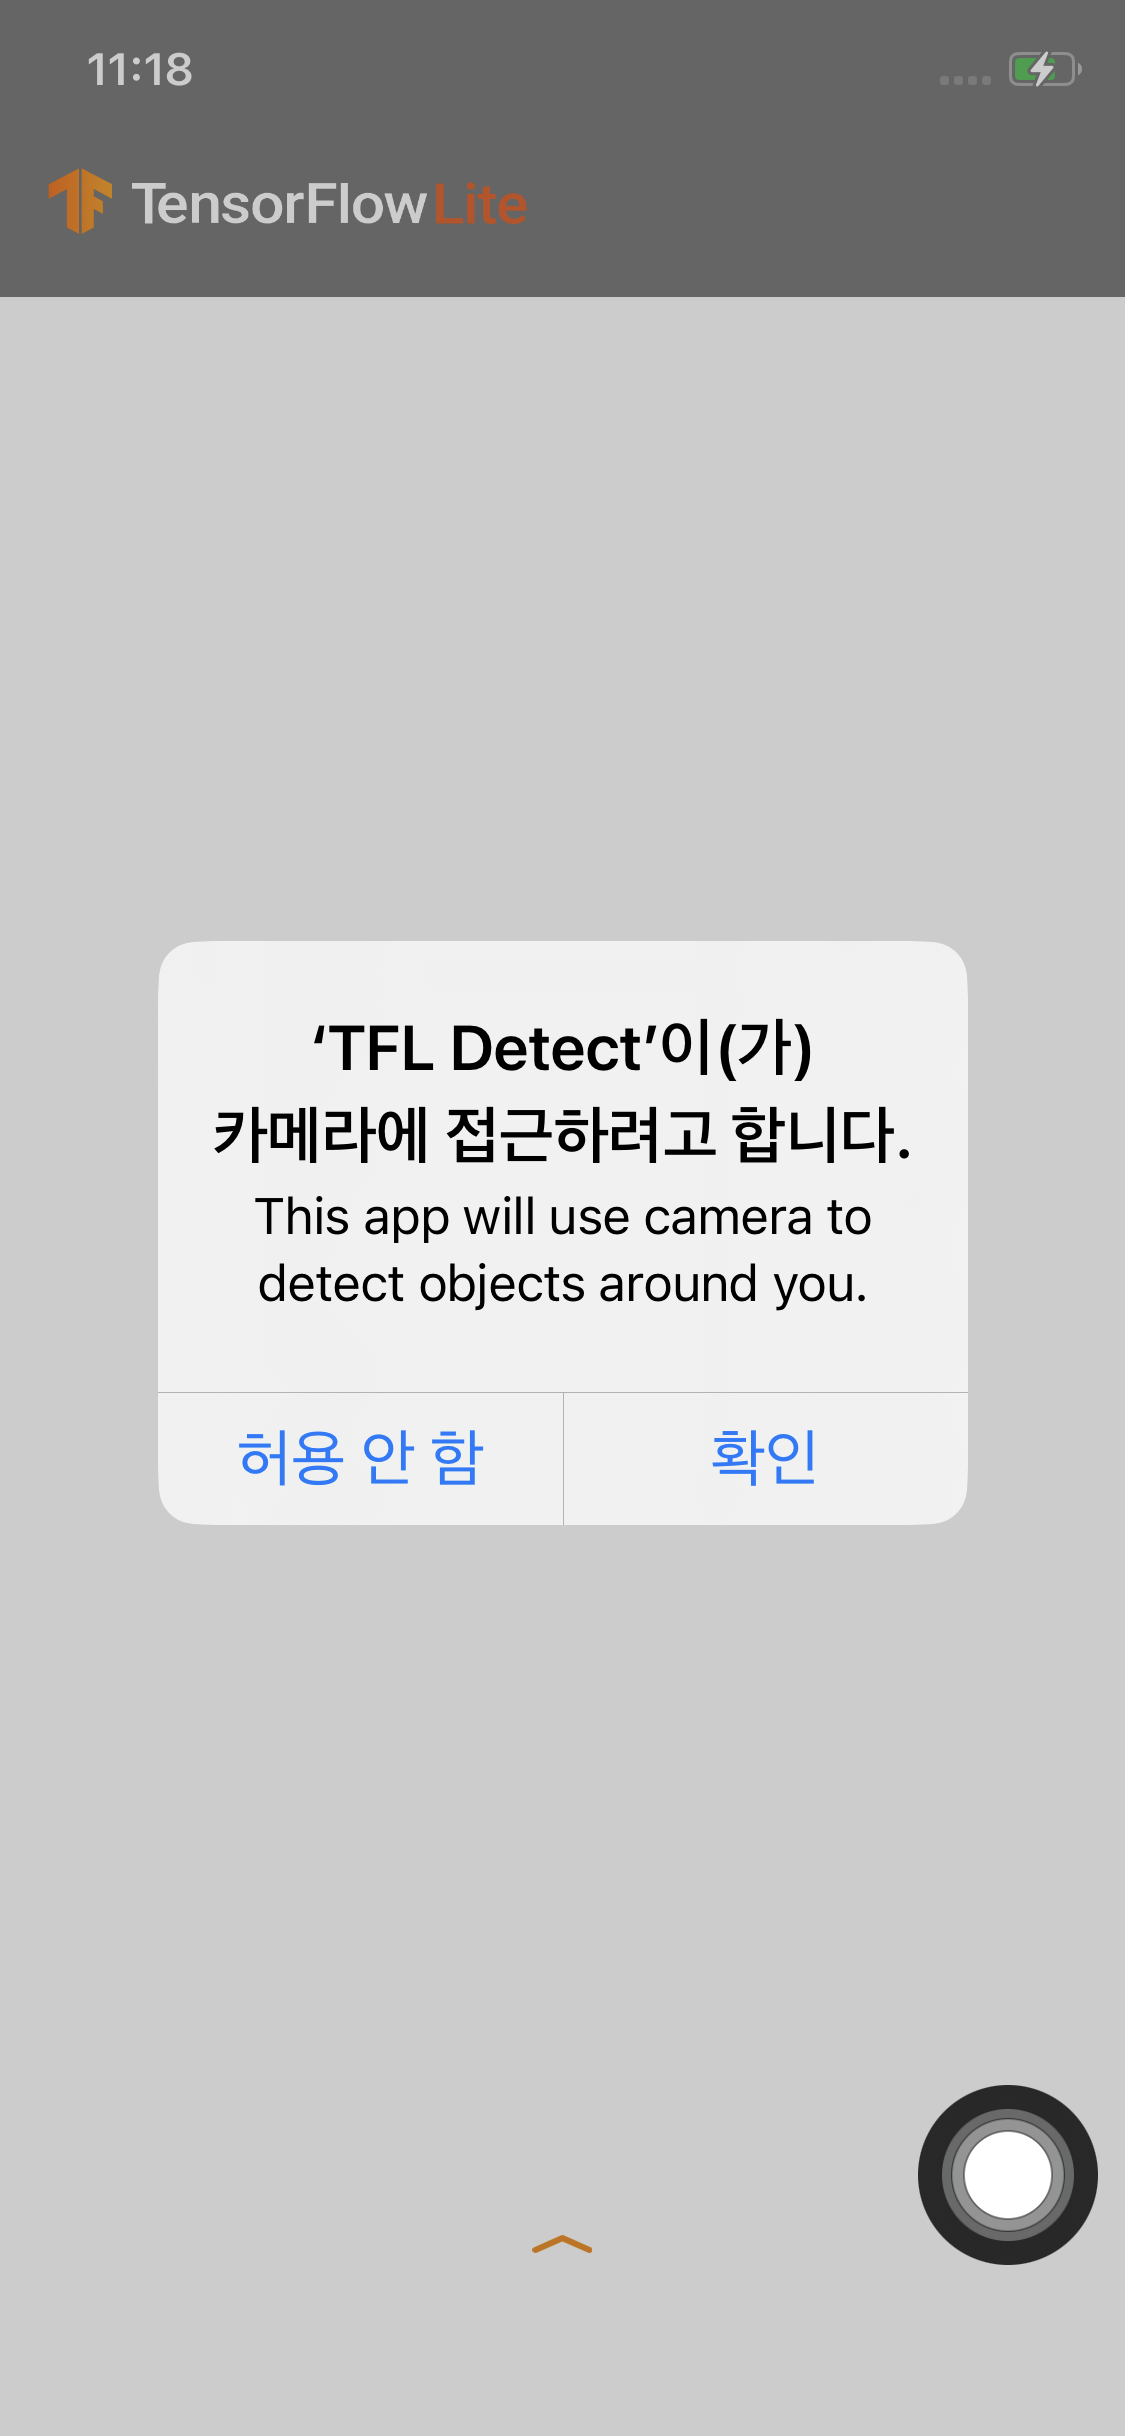
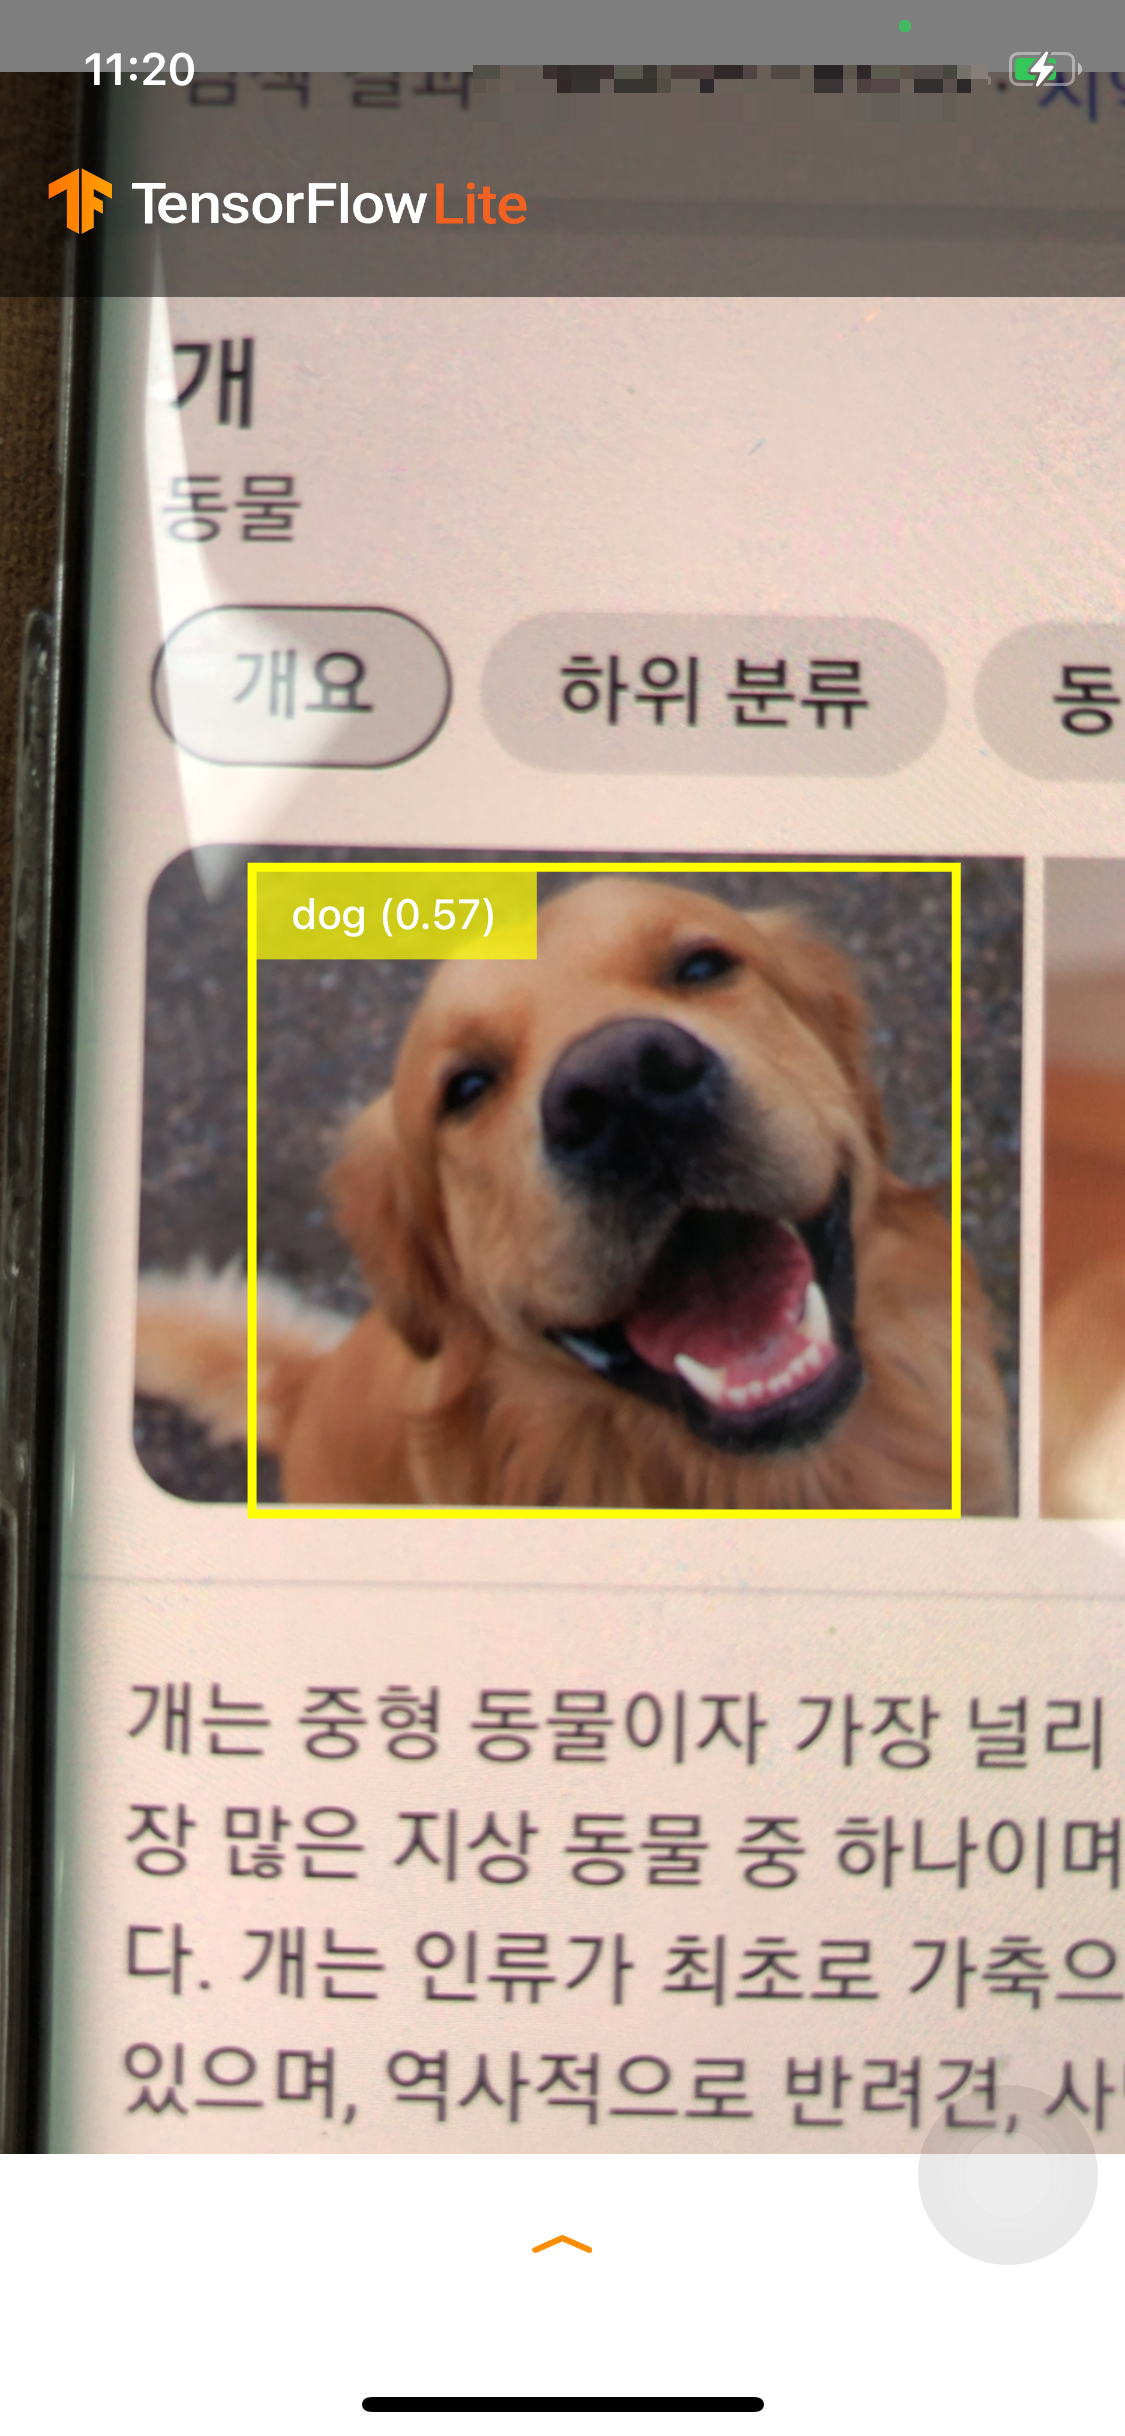
결론 : ReadMe를 잘 읽어보자.
'개발통합환경(IDE) > XCode' 카테고리의 다른 글
| [XCode] 코드 블럭 숨기기 (1) | 2023.09.24 |
|---|---|
| [XCode] Console창에서 변수 값 보기 (0) | 2023.07.09 |
| [XCode] 소스코드에서 디버그 모드와 릴리즈 모드 구분하기 (1) | 2022.12.16 |
| [XCode] plist 이름 바꾸기 (0) | 2022.09.18 |
| [XCode] 소스코드의 여러 문자열 한번에 변경하기 (0) | 2022.09.02 |


